Feature
Integrating OAuth2 Authentication with Germain Using Okta
Configuration in Okta
-
Sign in to your Okta organization as an administrator.
-
In the Admin Console, go to Applications > Applications.
-
Select the OpenID Connect (OIDC) or OAuth 2.0 app that needs grants added.
-
Under the General Tab, navigate to the Login section.
-
Modify Sign-in redirect URIs according to the template:
https://<host>:<port>/login/oauth2/code/<client_id>-
Example:
http://localhost:8080/login/oauth2/code/0oa7asda8tu9esOGL5d7 -
Note: You can find the Client ID in the Client Credentials section on the same tab.
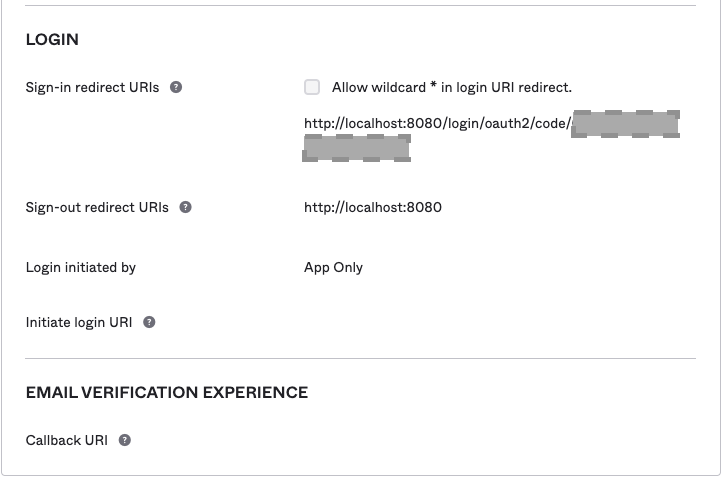
Sign-in reditect URIs for OpenID - Germain UX
-
-
Make a note of the Client ID and Client Secret from the Client Credentials section. These values are needed for configuring the Germain Authentication Provider.
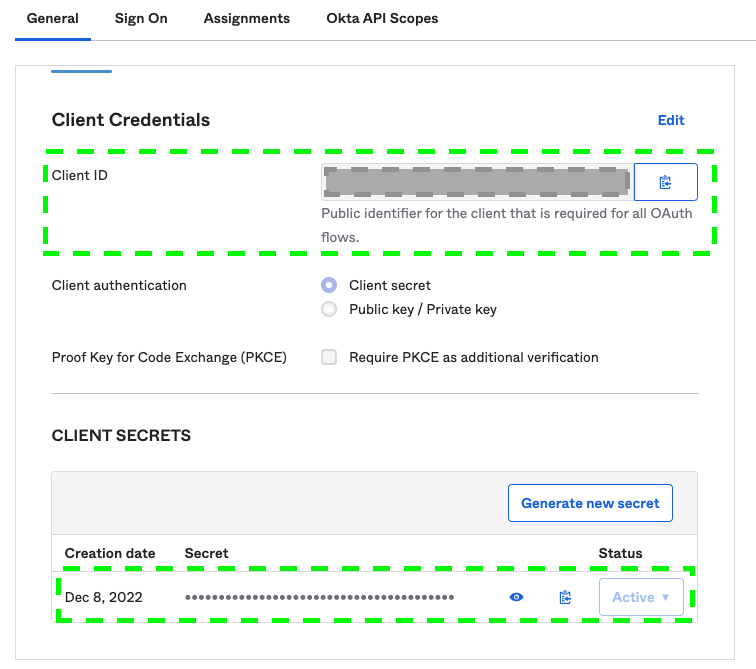
Client ID Secret and Credentials for OpenID - Germain UX -
Under the Sign On tab, go to the OpenID Connect ID Token section and update the Groups claim filter as follows. This allows Germain to extract Group information from Okta and map them to Roles configured in Germain.
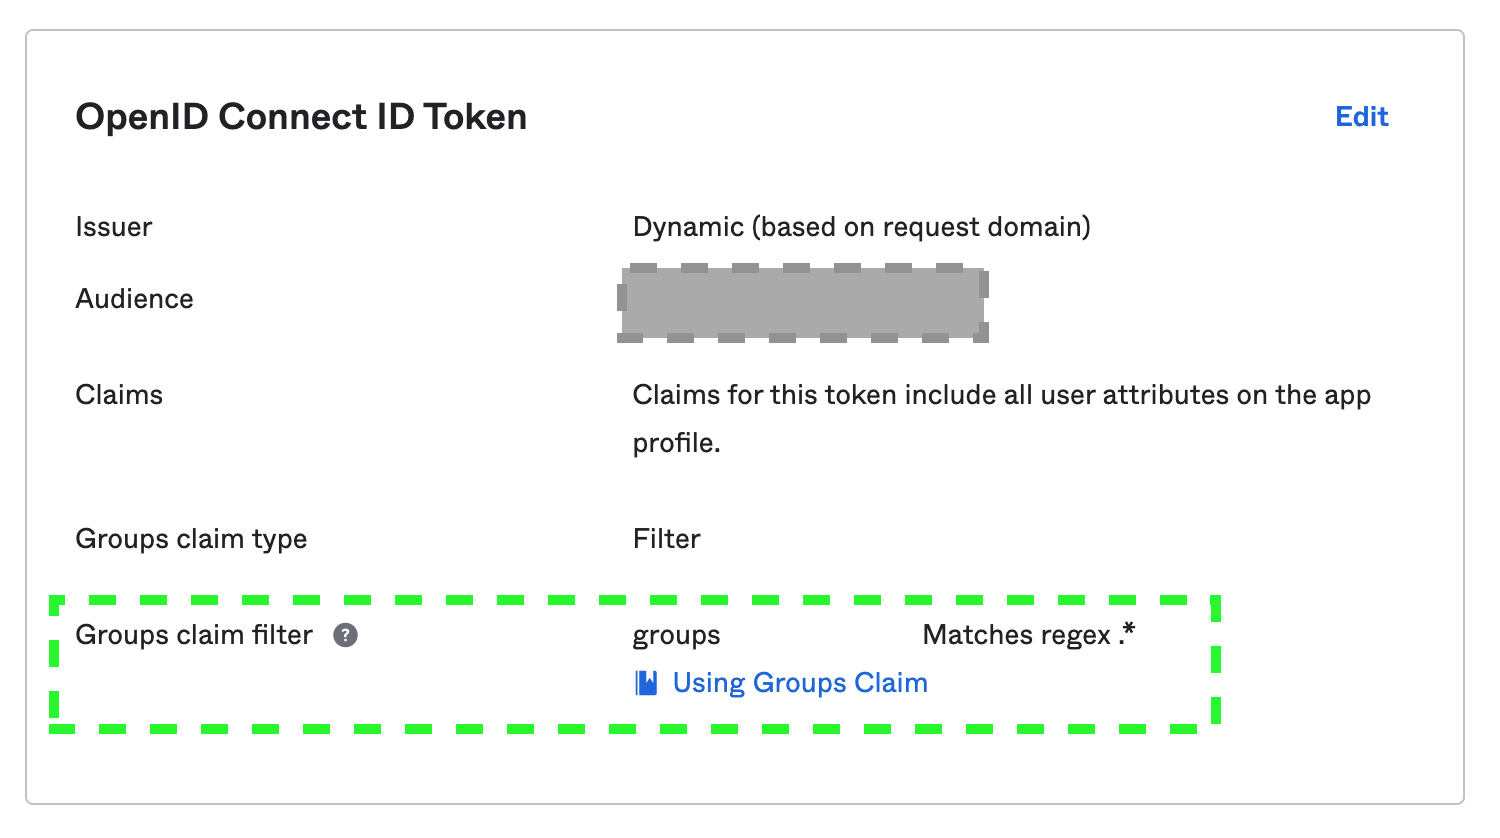
Group Claim Filter for OpenID - Germain UX -
Map Okta user groups from Group Claims Filter:
-
Group claim type: Filter
-
Group claim filter:
groups Matches regex .*
-
-
Map Active Directory user groups from Group Claims Filter:
-
Group claim type: Expression
-
Group claim filter:
groups Groups.startsWith("active_directory", “Group_Name”, 100)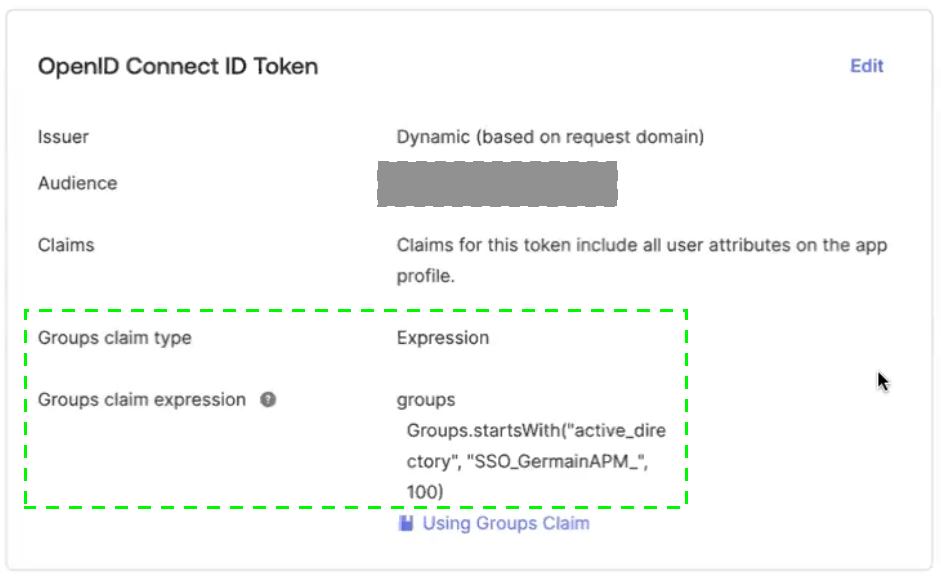
Group Claim Type and Expression- Germain UX
-
-
Configuration in Germain
-
Sign in to your Germain application as an administrator.
-
Go to System > System Settings > Root Config (Advanced).
-
Navigate to monitoringConfig > systemConfig > authentication. In AuthenticationConfig, set the following:
-
defaultRedirectPath: workspace URL (e.g.,
http://localhost:8080/germainapm/workspace/app)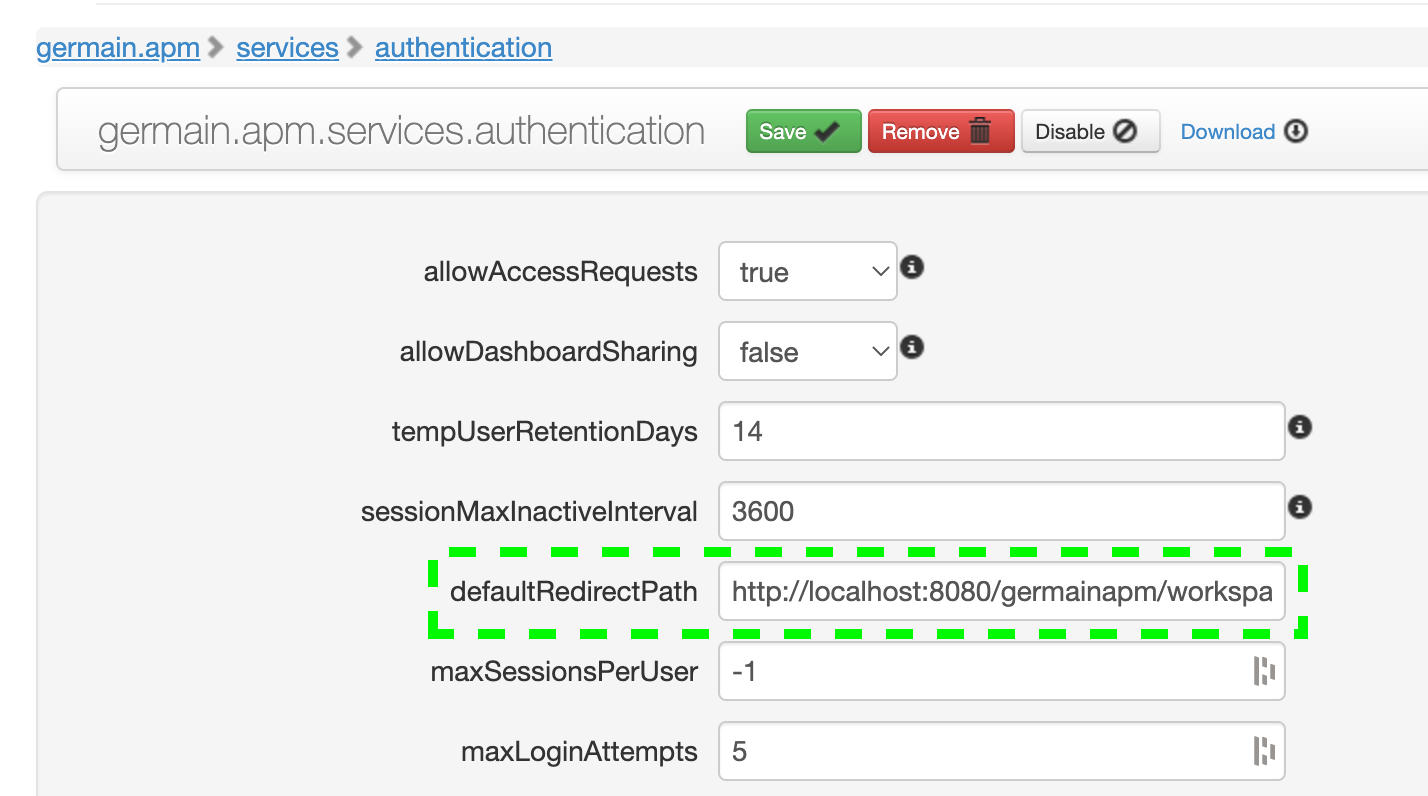
-
-
Go to System > Auth Settings > Authentication.
-
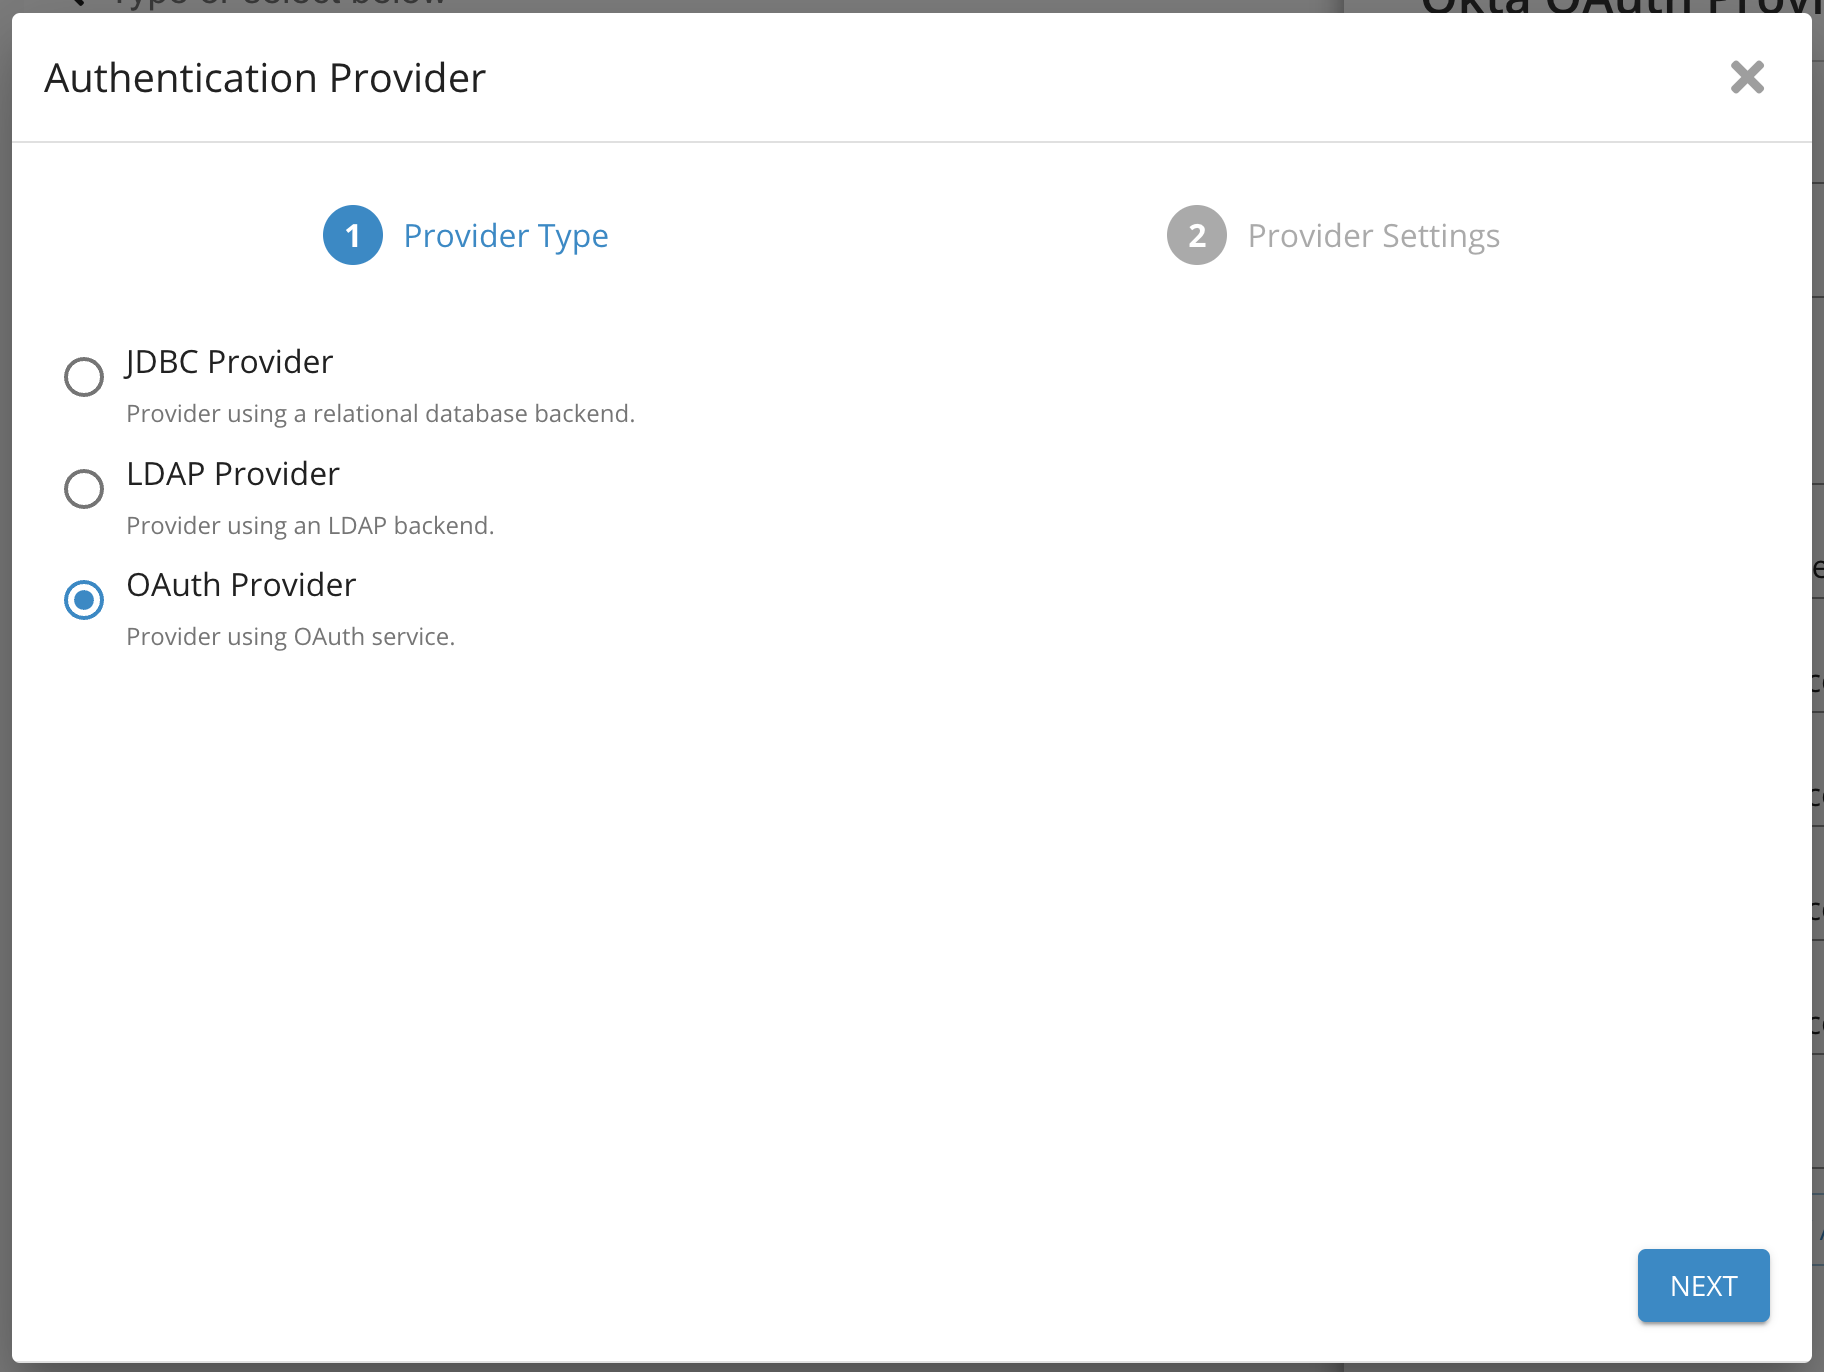
Click the Plus button to add a new Authentication Provider.
-
Select OAuth Provider and click next.
Select OAuth provider - Germain UX -
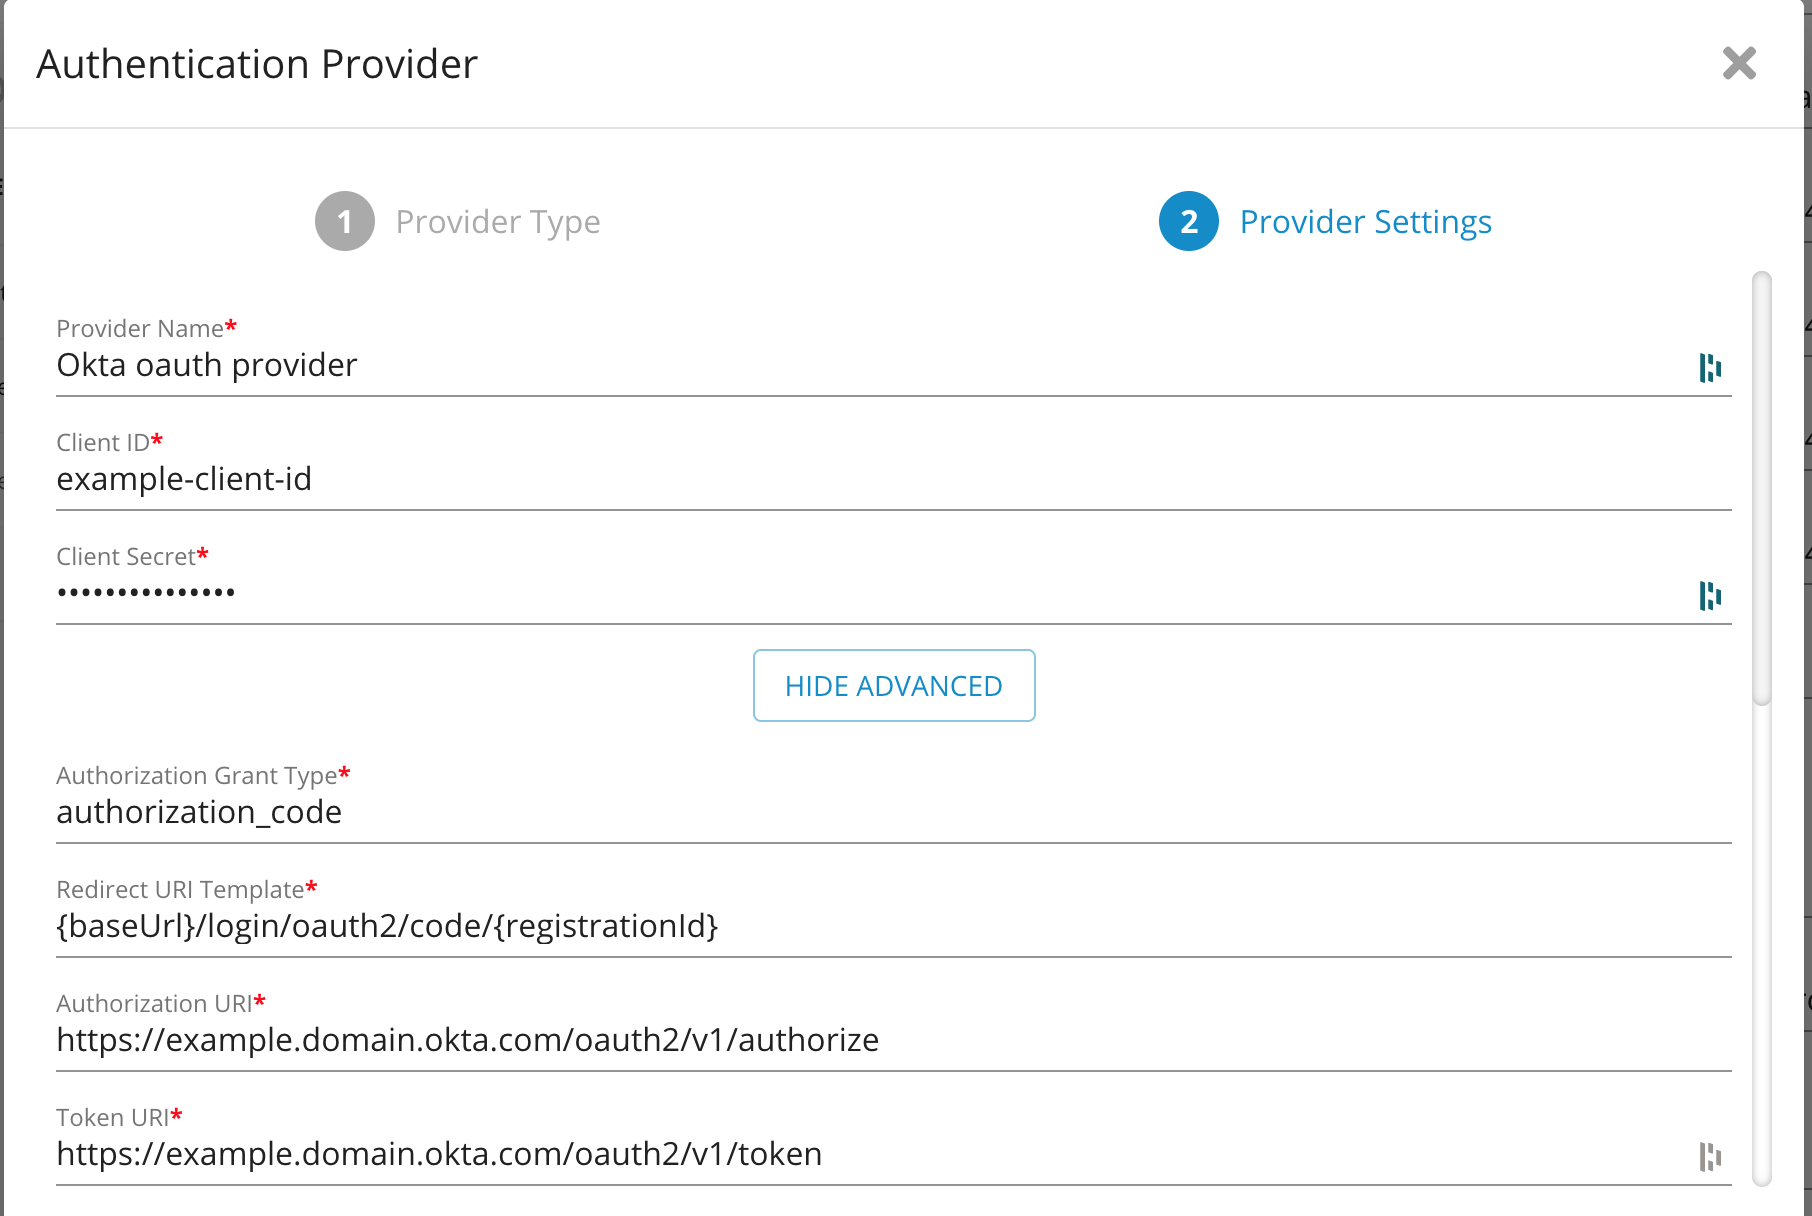
Configure the provider settings:
-
Provider Name: Name for your Auth Provider
-
Client ID: <Client ID Copied from Okta>
-
Client Secret: <Client Secret Copied from Okta> (or empty if using a public OAuth client - note this is not recommended, if Client ID is empty, PKCE is used by default)
-
Authorization Grant Type: authorization_code
-
Redirect URI Template:
{baseUrl}/login/oauth2/code/{registrationId} -
Authorization URI:
https://<yourOktaDomain>/oauth2/v1/authorize -
Token URI:
https://<yourOktaDomain>/oauth2/v1/token -
User Info URI:
https://<yourOktaDomain>/oauth2/v1/userinfo -
JWK Set URI:
https://<yourOktaDomain>/oauth2/v1/keys -
User Name Attribute: email
-
JWS Algorithm: (leave blank)
-
Role List Path: userInfo.claims.groups
-
Scope values: openid, profile, email, groups
-
Use PKCE: enable this to force using PKCE
-
-
Click Finish.
-
Restart the Tomcat services to apply the changes.
-
If you have any issues with logging in with your OAuth provider after restarting, you can enable
DEBUGlogging in the REST service for the following packagecom.germainsoftware.apm.auth.securityThis will provide additional logging in the REST service log file (when a login attempt is made) to help troubleshoot any configuration issues.
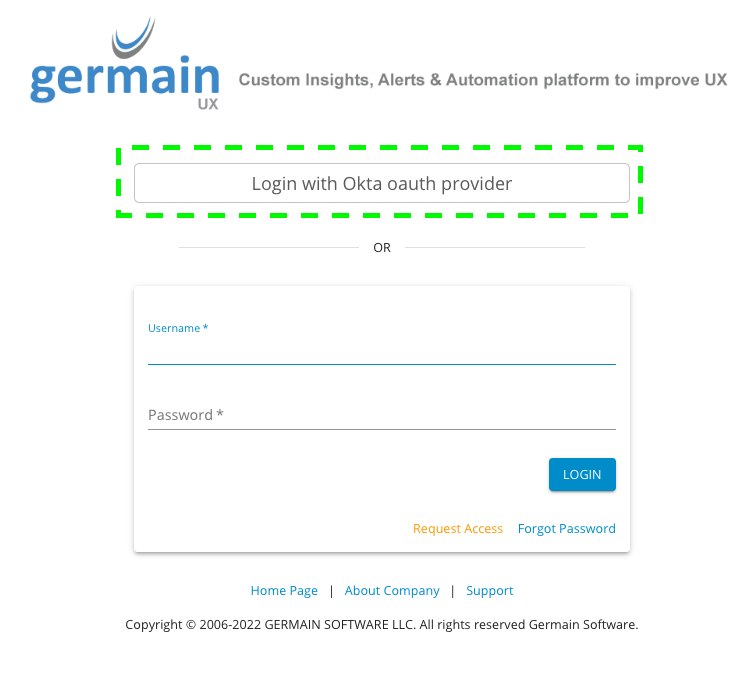
Once completed, the login page should display the "Login with Okta" OAuth provider option.
Service: Authentication
Feature Availability: 8.6.0 or later