Feature
Creating Groups and Users in Active Directory for Germain
Creating Groups in AD
-
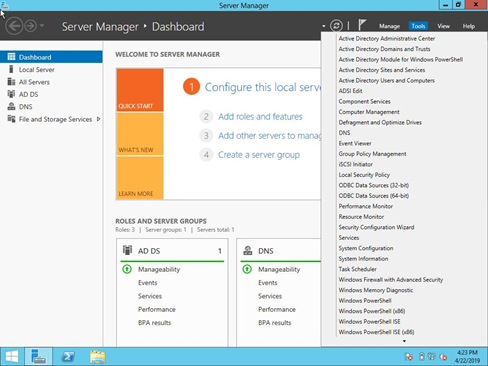
On the Windows machine with AD installed, open "Server Manager."
-
From the Tools Menu in the upper-right corner, select "Active Directory Users and Computers."
-
In the left-side menu, navigate to your domain name.
-
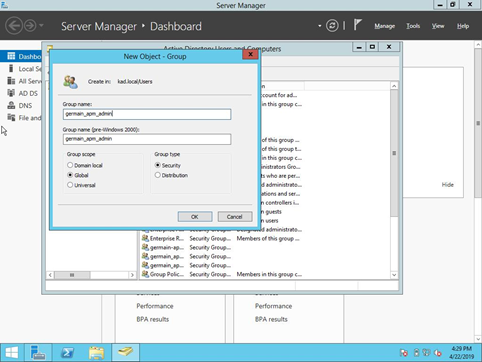
Right-click on "Users" and select "New" -> "Group."
-
Create a group named "germain_apm_admin" and click "Ok."
-
Repeat the above steps to create a group named "germain_apm_user."
Creating Users in AD
-
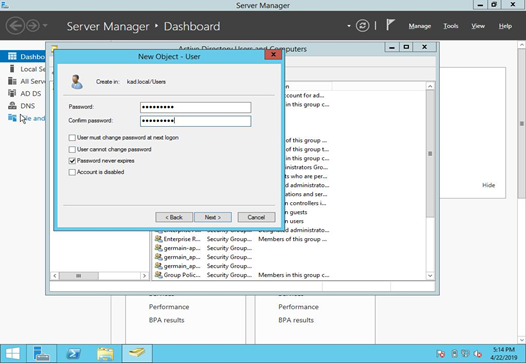
To create new users, right-click on "Users" in the "Active Directory Users and Computers" window, then select "New" -> "User."
-
Add First Name, Last Name, and Logon Name, then click "Next."
-
Set the password and select "Password Never Expires," then click "Next."

-
Click "Next" and then "Finish."
-
Repeat the above steps to create additional users.
Adding Users to Groups
-
With groups and users added, now assign users to the groups.
-
In the "Active Directory Users and Computers" window, locate the users and groups you created on the right side.
-
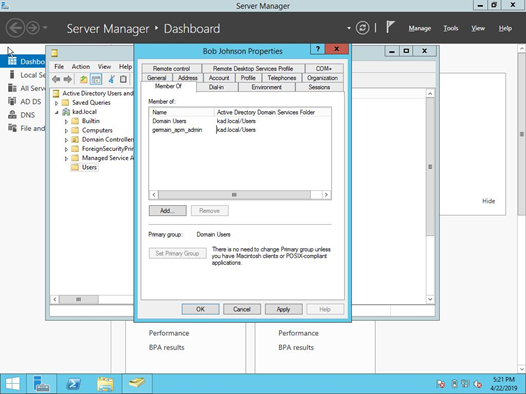
Right-click on a user (e.g., "bob johnson") and select "Properties."
-
Select the "Member Of" tab at the top, click "Add," and a pop-up window will open.
-
Enter the group name as "germain_apm_admin" and hit Enter. You will see this group added in the "Member Of" list for the user.
-
Click "Apply" and then "Ok."
-
Follow the same steps to add the second user to the "germain_apm_user" group.
Service: Authentication
Feature Availability: 8.6.0 or later