Configuration - Dynamic DB Table creation
Customer(s)
Largest US-Based Healthcare
Description
Allows you to create your own custom Database Table within Germain data model, without having to deploy a new release of Germain. These Tables can be used to store data which does not fit the out-of-the-box data model. Some customers have used this mechanism to integrate Germain with other database and store data into Germain datamart.
How to create a new custom database table:
- Open the Germain config console and navigate to germain.apm.monitoringConfig.systemConfig.datamart.dynamicTypes
- Add new dynamic type
- name: we’ll chose “CustomFact” as a name for this example
- parentClass: For most use cases, parentClass should be set to “com.germainsoftware.apm.data.model.Fact”.
- tableName: name of the table you wish to create (in the below example, we created a table called "TEST_FACT")
Once done, click on “Create”:
- Next, define the fields that should be available on your new model class. By default, all model types have the following properties:
- id (Unique identifier)
- timestamp (Date/Time associated with the data)
- type (Type identifier which ties the data to a KPI)
You do not need to define these above properties. - A few examples of custom fields:
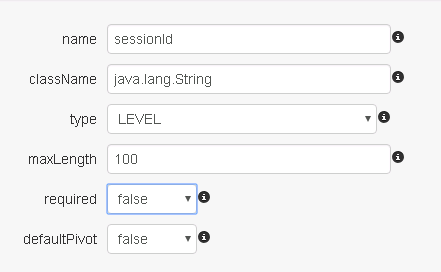
- If you want to store a single string value, for example a session ID, you can use the following field configuration:

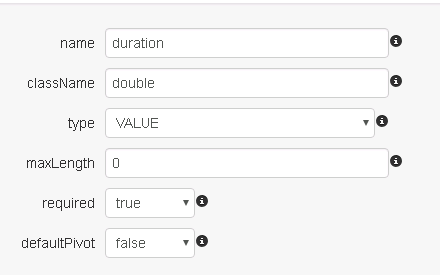
- If you want to store a numeric value, for example the duration of a transaction, you can use the following field configuration:

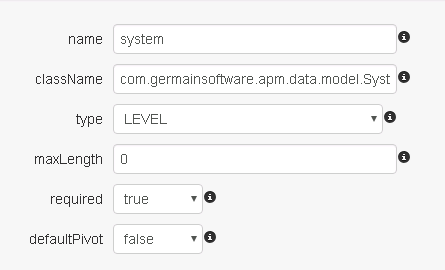
- If you want to store system information on the custom fact, you can use the existing system dimension data type:

There are other pre-defined dimensions available that cover many common use cases. Out-of-the-box, Germain contains dimensions to store the information like: user, user agent (browser), database, application, location, HTTP referrer, etc.
- If you want to store a single string value, for example a session ID, you can use the following field configuration:
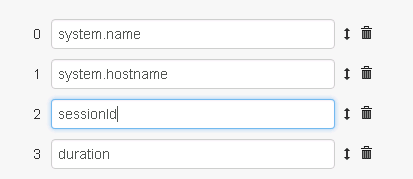
- Once you have defined the custom fields on your model, you must choose which of these should be included for aggregation. Any fields that are not included will only be available as long as there is raw data. Once the raw data has been purged, only aggregated fields will remain. To configure the aggregated fields, navigate back to the custom type and click on the aggregateFields collection. Then add any field names that you want to include – as before, you do not need to specify the build-in fields id, type, and timestamp.

- At this point your model is complete. In order to make the Germain system aware of the new model, a restart of the Germain services is necessary.
- Once the services have been restarted, you can now retrieve the schema for your database implementation by navigating to the following URL on your browser:
https://<path to your Germain>/query/schema/<database flavor>/<type name>
For example, to get the schema for a type named “CustomFact” on Oracle, use the following URL:
https://<path to your Germain>/query/schema/ORACLE/CustomFact
Once you create the tables in your datamart schema, you are ready to reference the new model type in monitoring rules and KPIs.
Important reminder: indexes (and other tuning options) aren't automatically generated to new custom database table. please have your DBA implement them to ensure optimal performance.
